After successfully installed the program adds Model Publisher and Property Publisher commands to the Navisworks Navistools Field tab.

With Model Publisher and Property Publisher you can export geometry and properties of the Autodesk Navisworks .nwd models to the Web Server and afterwards browse them with normal Web Browser.
Tutorial
Using Model Publisher with local php web service installed on Windows
To follow this tutorial you need to have php installed on Windows. Please follow Install PHP on Windows instructions to install php if needed.
1. Publish model geometry and properties to the Web Service

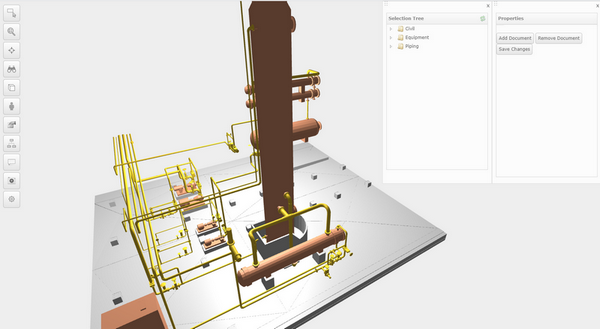
Please open C:\Navistools\Models\Pdms.nwd. The model already has Selection Sets that are used for exporting the model in several groups. Idea of using groups is that you can turn them on and off afterwards when browsing the model with the Web Browser.
1.1 Create mappings for publishing different parts of the model
Sample Pdms model already has Selection Sets of different disciplines e.g. Equipment and Piping. First, we need to create Groups for these Selections Sets

To create a group of civil model items, please switch to Mappings tab and press Add Definition button and
1) Select next available group number from the 1st dropdown list (ids3)
2) Enter name of the group into 2nd field (Civil)
3) Select Selection Set to use (Civil) from the 3rd dropdown box.
4) Enter name of the database table into the 4th field. You can use same name that you were using in group name, but in lowercase (civil) This is the name of the database table which is used when model item is linked with database information. Table will be populated with Navisworks properties described in next chapter.
5) press OK to create a new group


After that you can go on adding other groups in the same way. Maximum number of groups to create at the moment is 50.

There are also other functions related to mappings which can be launched from the toolbar buttons:
- Create New Mappings
- Open saved mappings with Read Mappings XML - button
- Save current mappings with Save Mappings XML -button
- Add Definition
- Edit Definition
- Remove Definition
1.2 Publish Model Name, Publishing Date and Model Parameters
1) Switch to Settings tab, select Pdms.nwd from the Selection Tree and press Model Parameters toolbar button. This is how to get center point of the model and height values to be filled in Model Parameters section of the Property Grid.
2) Enter Model Name and Publishing Date to the Header section and
3) Enter 1,2,3 to the Initial Groups to display field. This means that groups number 1, 2 and 3 are automatically displayed when opening the model in Web Browser.

4) After that check that Publish to Localhost is selected and save parameters into in the web service by using Export Parameters toolbar button

These parameters are written into the parameters.json file into the localhost folder (default c:\Navistools\Localhost)

1.3 Publish geometry of civil model items (Group ids3)
In this tutorial, we are now creating a group (ids3) from model items that represents civil model items and publish it to the web server. The model already has a Selection Set called Civil that we are going to use.
1) Select Pdms for ModelItem Names from the popup list in Identification section. Pdms is selected because this tutorial is using Pdms model and model items will be linked to database by using Item / Name property. If you are publishing e.g. IFC based model, use then Guid instead.
2) Select ids3 for Group from the popup list
3) Group Name and Table is populated automatically based on mappings created before
4) Press Export to publish the group into the local Web Server. Two files are created for each group into the localhost folder. Name of the files are idsx.json and grpx.json where x is a number of the group.
5) After that you can publish another Group (e.g. ids4) in the same way if it has been already added into mappings.

1.4 Publish properties of equipment model items (Group ids1) to the database
For publishing properties to the data service database, we are using plugin called Property Publisher.
1) Select Equipment Selection Set from Navisworks Sets window. Related model items will be highlighted.

2) Check that plugin is connected with C:\Navistools\Localhost\rest\browser.s3db SQLite database. If not, you can change data source with DataSource toolbar button

3) Populate all properties from Equipment Selection Set to the Data table by using Generate DataTable command.

4) Change to Select tab, select all properties under the Database branch and press Populate Properties command. Now only properties from Database property category will be published to the Web Server.

5) Press Upload to SQLite toolbar button to start loading data to the data service database.
Enter equipment for Table Name and select Node for Key Column from the popup lists. Check Override Table if exists and press OK
(If you are publishing IFC based model, use then Guid instead of Node for Key Column)

After that first group (ids1) is published to the local Web Server and related properties are published to the local database. Now you can start browsing exported model with the Web Browser and keep on publishing other groups using the same procedure.
2 Browse published model with Web Browser locally
1) Run C:\Navistools\Localhost\Server.bat. It will start local PHP Web Server. You can minimize this window but don’t close it.

2) Navigate with Web Browser to localhost:8000/main.php
For more information, please check Using Navistools Model Browser